TeXposit is a collaborative LaTeX editor with an optional AI assistant. This page covers creating a project, the layout of the editor, and compiling.
Create a project
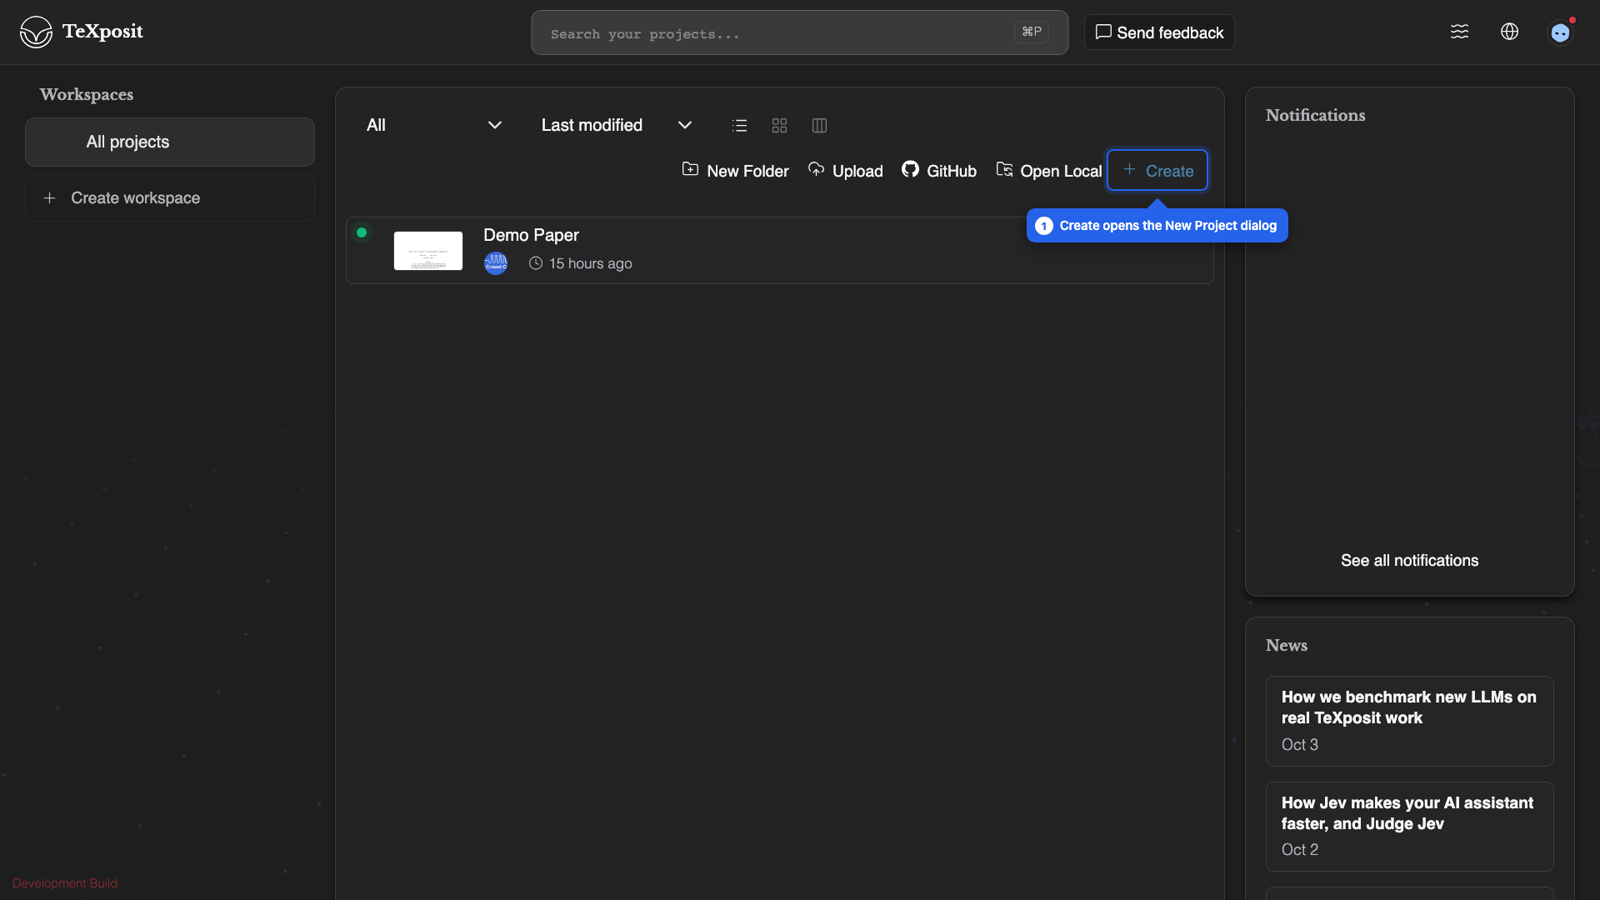
- On the projects page, click Create. The Create New Project dialog opens.
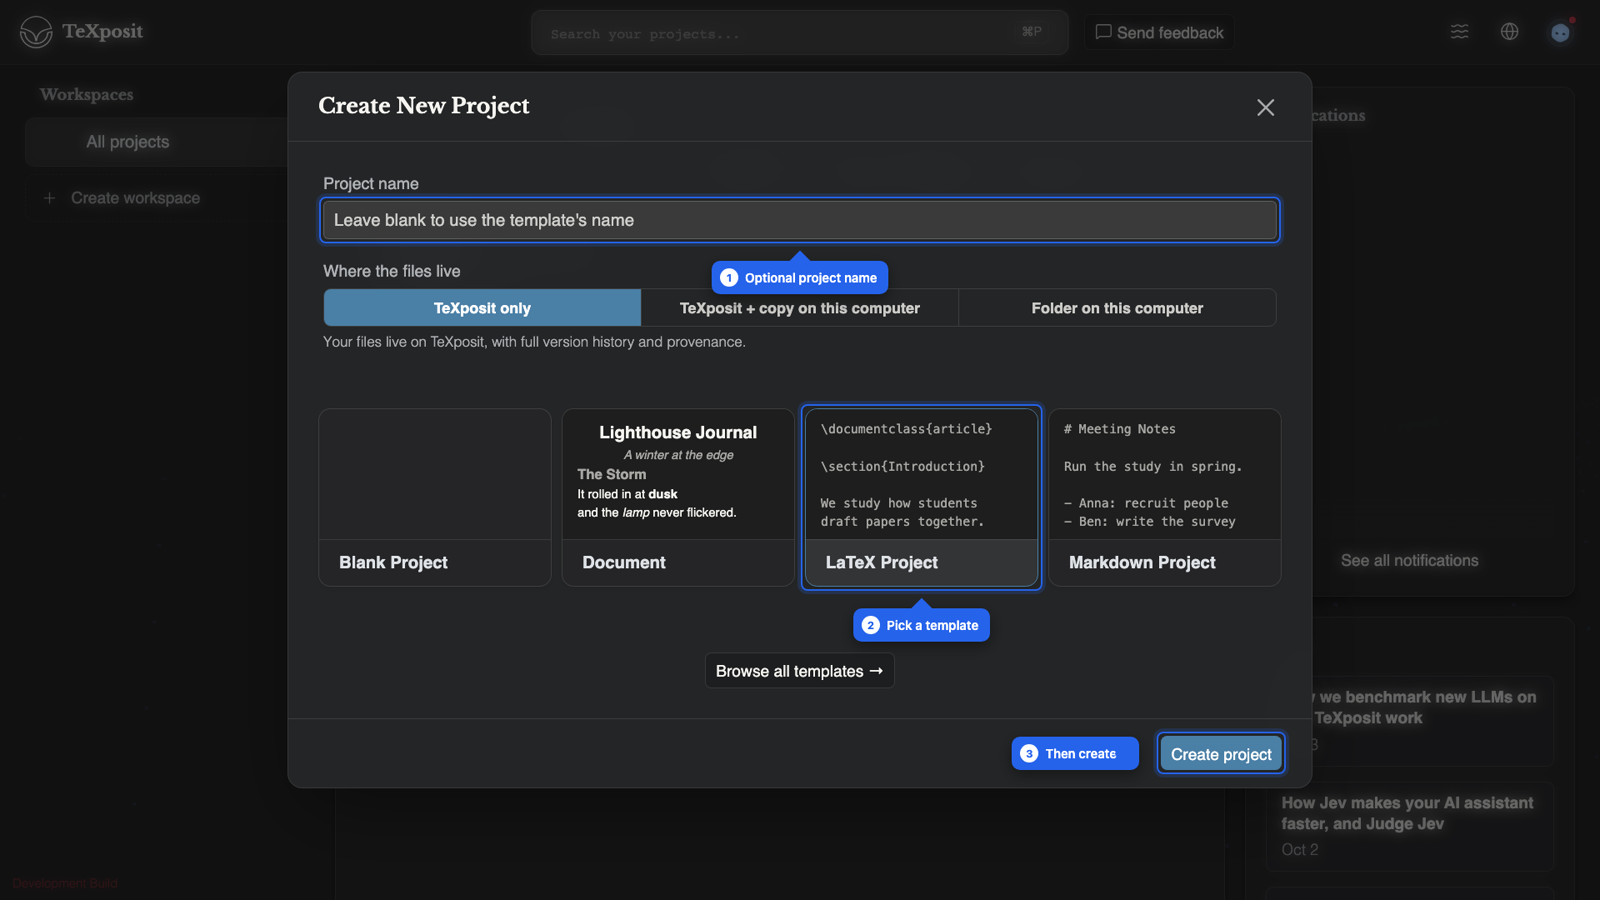
- Pick a template:
- Blank Project: no files at all, for custom setups.
- Document: formatted pages with headers, footers and page numbers, edited in the visual editor. No LaTeX compile.
- LaTeX Project: an article skeleton with sections and a bibliography.
- Markdown Project: plain-text notes and drafts, opened in the visual editor.
- Optionally enter a Project name. If you leave it blank, the template's name is used.
- Click Create project.
The editor
- File tree (left): your project's files and folders. Click a file to open it. Toggle the sidebar with Ctrl/Cmd+B.
- Editor (centre): where you write. Switch between Source Code and Visual (WYSIWYG) from the toolbar.
- PDF preview: the compiled document. Toggle it with Shift+Esc, and swap the panes with Ctrl/Cmd+Shift+Esc.
- AI assistant: a chat panel for questions and edit requests. Toggle it with Ctrl/Cmd+Shift+B.
- Toolbar and palette: the toolbar holds the layout and view controls. The action palette (Ctrl/Cmd+P) reaches files, commands and citations from the keyboard. See the action palette.
Drag the dividers to resize panes.
Compile
Press Ctrl/Cmd+S to save and recompile. The same command is in the menu as Save & Recompile. The PDF preview updates when the compile finishes. If it fails, the error log is shown in the preview pane. In manual compile mode the preview toolbar also has a Compile button.
History
Every save is recorded as a version of your project. To browse it, click the History button in the toolbar, or choose View Edit History from the menu.
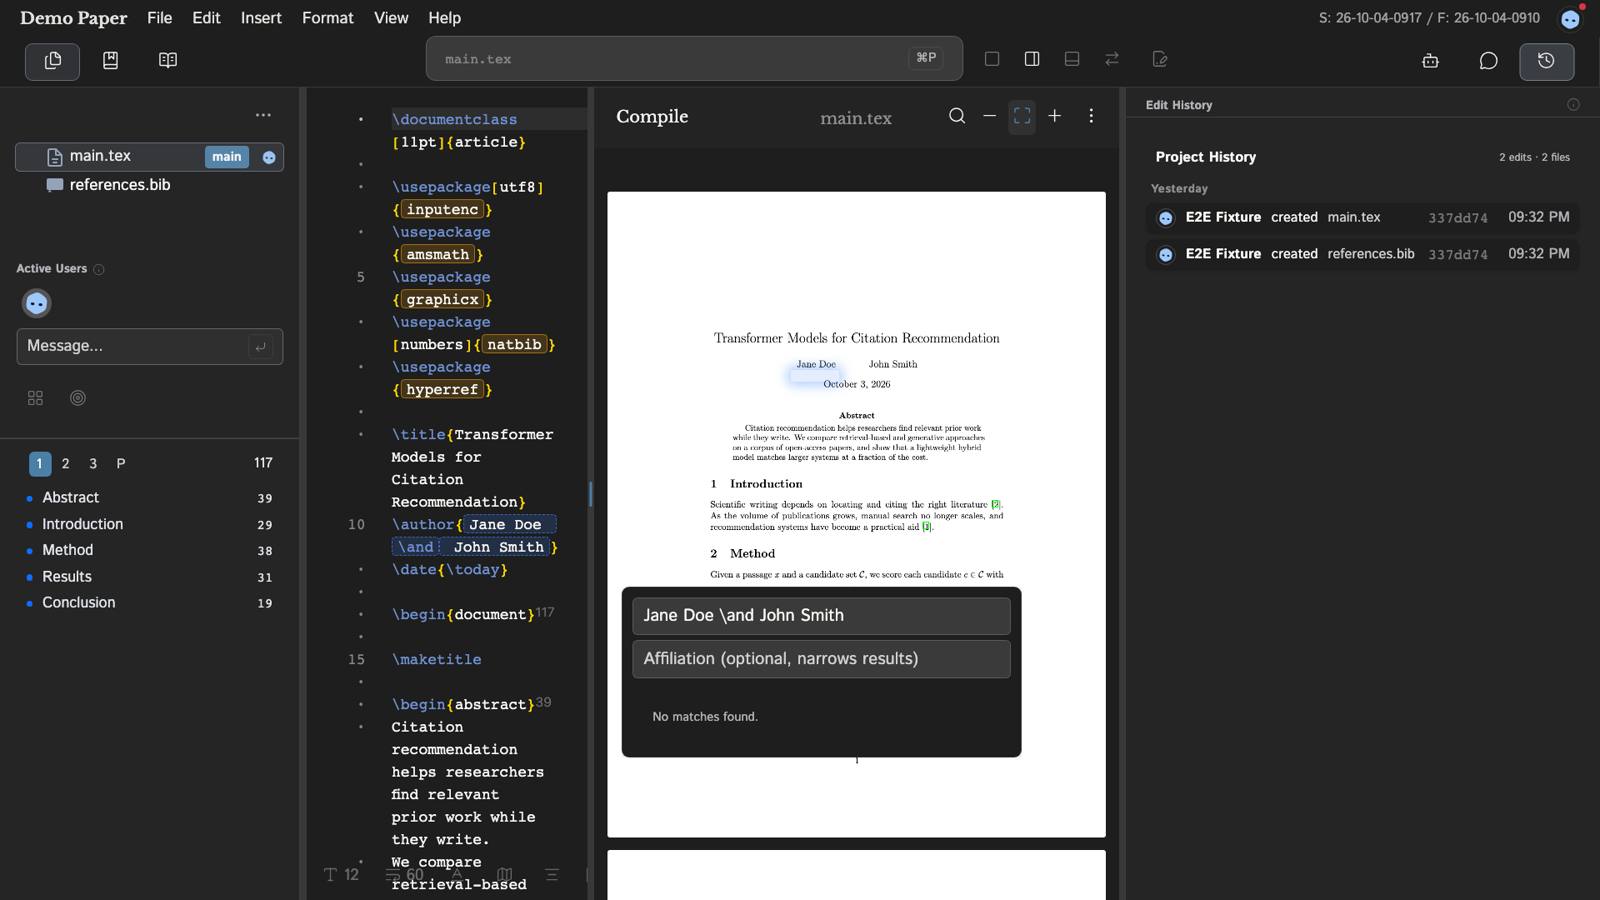
- The project history lists the changes made to the project.
- Pick a file to see that file's history.
- Select lines in the editor and use Show History for Selection to see the history of just those lines.
- From a past version you can preview a restore and revert the file to that state. Reverting creates a new history entry, so you can undo it later from the history view.
History is not available for local projects, which use a folder on your computer as the source of truth.